Electric Fence Post Installation
IMPORTANT: Check with your gas company and other utilities before you dig! Buried gas lines, electrical lines and water lines can result in serious injury or death if you puncture them or come in contact with live wires.
Before learning about fence posts, we recommend visiting our information page on selecting a fence type. Your fence post selection will depend on lifetime of the fence (permanent, temporary, or portable) and your budget.
General Guidelines for Post Spacing
|
Fencing parameters |
Spacing (feet) |
|
Woven Wire |
14-16 |
|
Barbed Wire |
12-14 |
|
Electric |
12-20 |
|
High-tensile, level terrain |
30-90 |
|
High-tensile, difficult animals, rolling terrain |
15-20 |
|
Poly tape and poly wire |
12 |
|
Board |
8 |
|
Corrals |
6 |

Wood posts at least 6 inches in diameter should be used at the corners and the ends of fence lines due to the extra strain at these locations. The post should be anchored 3 to 4 feet into the ground.
Corner posts are the keys to a sturdy fence. Consider using brace posts during long runs of multiple-wired fences. Line posts need only support the wire between the corner posts.
Posts need to be placed wherever there is a high or low spot in the fence line terrain.
On hillsides, posts should be installed perpendicular to the slope. This keeps the wire at the proper height and spacing. Before you start installing your posts, we recommend visiting our electric fence planning guide.
Setting corner, end, and line brace assemblies
Corner and end posts, along with line brace assemblies, are the backbone of your fencing system. In order for your fence to stand up to the strain of a tensioned line, it is imperative that you do things right the first time and set posts deep.
Step-in, pigtail, rebar, fiberglass posts, and t-posts are not recommended for corner posts. Although they are less expensive than wood posts, they cannot hold up to the strain and tension applied to these areas of the fence.
Important things to remember when setting corner, end, and line brace assemblies:
- Set corner posts leaning back from the direction of the fence approximately five degrees.
- Corner posts require a brace assembly for each fence leading to it.
- With fences more than 200+ feet, it is best to use a double span assembly.
- Brace wire should pull in the opposite direction than the fence is pulling.
- When spans between posts exceed 650 feet use braced line post assemblies every 650 feet of the fence line. (Note: Brace line assembly is the same as a single span braced corner, but uses a second diagonal brace wire to pull the fence in the opposite direction.)
- If adequate post bracing cannot be achieved, additional bracing will be required to maintain tension.
Setting fence posts
How you set your fence posts will depend on the type of posts you have chosen.
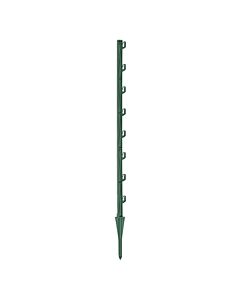
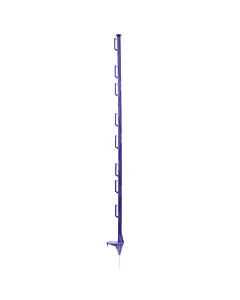
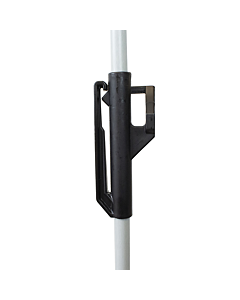
Step-in and Pigtail Posts
These posts are easily set by stepping-in or pushing the base of the post into the ground. Rebar/fiberglass posts must be driven into the ground with a rubber mallet.
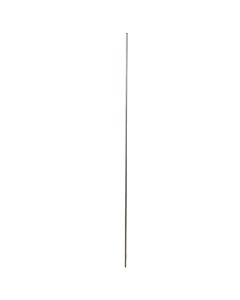
T-Posts and Rebar
T-posts are most effectively set by using special tool known as a t-post pounder. You can purchase a "post pounder" from the same source where you buy your electric fence supplies. A heavy pipe with a closed end can also work. Rebar can be pounded into the ground with a heavy hammer.
Wooden Posts
Wooden posts, which will make up end, corner, and brace posts, can be driven into the ground with a post pounder or tamped into place. An additional method to set wooden posts is to dig a hole larger than the post diameter. Place the post in the hole and then repack the soil around it. You want to make sure you center the post before tamping. This will make tamping easier and allows soil to pack tighter around the post. Continue to replace small amounts of soil and tamp. Be sure to plumb the post to make sure it is level.
To set wooden fence posts, mark your digging tool to the desired depth fence posts will be set. This will ensure uniform depth.
A depth of 3 - 4 feet will usually work, however in sandy or rocky soil, the fence posts will need to be set deeper than in clay or dirt. Also, the amount of tension on the wire at the corner will determine the depth.